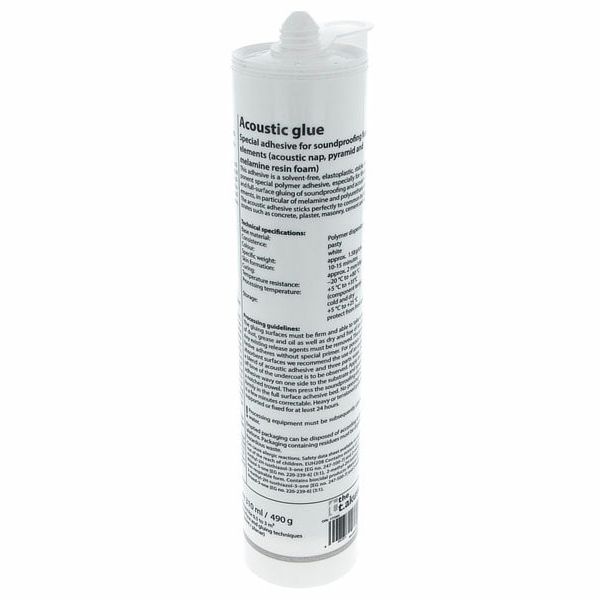
t.akustik Contact Glue

1728

Acoustic Adhesive

  • For acoustic convoluted, pyramids and basotect
  • Solvent-free
  • Elastoplastic
  • Single-component special polymer adhesive
  • Fast-curing and more universal than structural and assembly adhesives
  • Especially for the punctual and all-over adhesion of soundproofing and acoustic elements made of foam in particular melamine and polyurethane foam
  • Adheres to customary construction substrates such as concrete, plaster, masonry, cement and wood
  • 310 ml/ 490 g Cartridge
  • For 0.5 m² to 3 m² depending on the substrate and adhesive technology (punctual/ all-over)
  • Note: Working temperature + 5° C to + 50° C
  • Storage: Cool and dry at + 5° C to + 25° C
  • Skin building time: 10 - 15 min
  • Colour: White
  • Consistency: Pasty
  • Base: Polymer dispersion
  • Spec. mass: Approx. 1.58 g/cm
  • Protect from frost and heat
  • Suitable hand-held cartridge gun: Article Nr. 417630 (not included)
  • New follow-up product: Article Nr. 481723 (not included)
Available since February 2005
Item number 177265
Sales Unit 1 piece(s)
Type Mounting Material
Container size 0.31
Packaging unit l
Show more
4,99 €
16,10 € / l •
Including VAT; Excluding 19,90 € shipping
Quantity Discounts
Price each You save Quantity
4,99 € 1
4,75 € 4,8% 3
4,59 € 8,0% 5
4,35 € 12,8% 10
In stock
In stock

This product is in stock and can be shipped immediately.

Standard Delivery Times
Delivery approx. between Thursday, 28.03. and Friday, 29.03.
1

1728 Customer ratings

4.4 / 5

You have to be logged in to rate products.

Note: To prevent ratings from being based on hearsay, smattering or surreptitious advertising we only allow ratings from real users on our website, who have bought the equipment from us.

After logging in you will also find all items you can rate under rate products in the customer centre.

quality

732 Reviews

K
Glue that works and is easy to apply - read on to find out how
Kristian2622 04.01.2016
Before I applied the glue, I had read pretty much all reviews here and realized that there's a bit of confusion as to how the glue should be applied and used. I put the best together, applied some common sense and ... it worked :)

This was the first time I attached acoustic panels onto a wall using a glue, and a second time in my life I used the sealant gun. 5 days after the application, the panels are still in place.

So.... If I could do it, you can do it.

What you need:

- Sealant gun to apply the glue.
You can get one in ANY hardware/DIY store. The glue bottle is exactly like the bottles bathroom sealants come in so any sealant gun would work. It can also be called a 'caulking gun'.

- Pencil, measuring device and spirit level (ideally a laser one).
That's all for measuring and making sure that your panels are nicely levelled. You want your studio to look professional, not sloppy.

- A nice wall.
Here's the deal - for any glue to work, it must form the bond with both surfaces. This will not work if your wall is greasy, dirty, painted with water-repellant paint etc. You may want to repaint your studio walls and ceiling with at least two layers of basic, non-glossy paint... and then wait a couple of weeks for the paint to dry out properly. This was exactly what I did after moving in to my new place.

- A helper.
Large acoustic panels will block your view of the markings you made on the wall. A second person will help you move the panel precisely to the desired position.

Important!
Do one tile/panel at a time and keep the window open. The glue does not stink much, but you can certainly sense the smell.

1. Plan ahead - make sure you know where you want to put your acoustic tiles/panels. I used several sheets from a common squared paper notebook.

2. Apply the glue on back side of the panel/tile.
Small tiles: 5 blobs (1 cm circle) of glue - 4 corners (1.5 cm off the edges) and center. You'll do no wrong if you just create a simple square and a blob in the middle.
Large panels: Create a wave pattern around the perimeter of the panel about 2 cm from the edge). Then do the same connecting the opposite corners (think 'confederate flag'). I'd attach a photo but there's no such option here.

3. Carefully lift the panel/tile and take it to the wall - maneuver it to the desired position but still keep it 2-3 centimeters (1 inch in old money) from the wall. Here's where the helper comes in to make sure you hit all the marks you made on the wall.

4. Press the panel/tile against the wall.

5. Apply mild pressure along the areas where you applied the glue. You will feel how the tile/panel is actually sucked onto the wall.

6. Move on to the next panel...

One tube was enough for 7 pieces of EQ Acoustics Classic Wedge 30 tiles and 8 pieces of t.akustik HiLo-N40 panels.
quality
45
1
Report

Report

DJ
good contact glue
Damjan J. 21.12.2021
It is rely very easy to work with it and panels stick even to the ceiling in a moment. Unfortunately after 4-5 years one or two panels fall off the ceiling, but the same glue was still in my hand and I put it back again. Strange not to fall down all of them, so was probably my mistake. Anyway I can recommend the product because of simplicity to work with it.
quality
1
0
Report

Report

Ep
t.akustik is aweome
EXODUS phm 22.03.2022
Love the products! I bought 3 sets of the manhattan eps set and they are TOP quality! beautiful and do an amazing job at handling my diffusion issues in my studio. Highly recommend!
quality
0
0
Report

Report

E
Very Helpful
EMTH 28.09.2020
I did what it was supposed to! Just remember to buy enough.
You use it very fast!
quality
1
0
Report

Report

YouTube on this topic